
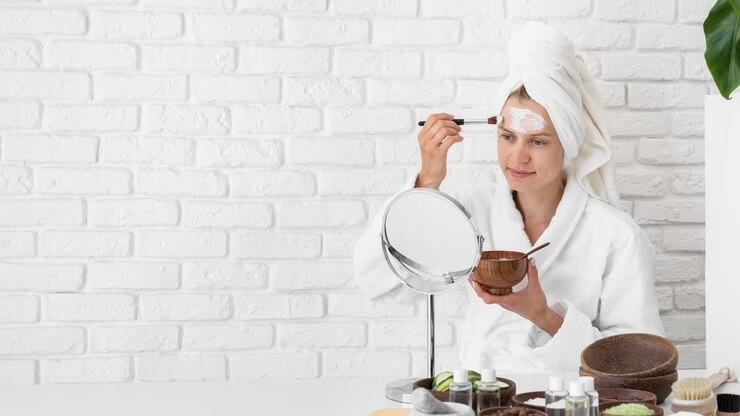
You know that feeling when you fall in love with a luxurious face cream, only to discover it costs more than your weekly grocery budget? I’ve been there too. That’s exactly why I started reverse engineering skincare products at home, and trust me – it’s been a game-changer. Not just for my wallet, but for understanding exactly what goes onto my skin.
Picture this: you’re standing in your kitchen, creating that $100 moisturizer for a fraction of the cost, knowing every single ingredient that goes into it. Sounds amazing, right? Well, that’s exactly what we’re going to achieve together in this chapter.

Understanding the Magic Behind Reverse Engineering Skincare
Think of reverse engineering skincare like being a beauty detective. Just as a detective pieces together clues to solve a mystery, we’ll break down fancy formulas into their basic building blocks. The best part? You don’t need a chemistry degree – just curiosity and attention to detail.
Let’s get real for a second: those fancy products you love? They’re built on some pretty simple principles. Water, oils, emulsifiers, and active ingredients come together in specific ratios to create something special. Once you understand these fundamentals, you’ll start seeing patterns everywhere.
The Art of Reading Product Labels
Remember the first time you flipped over a skincare product and felt overwhelmed by that ingredient list? Those days are over. Here’s a secret that changed everything for me: ingredients are listed by concentration, from highest to lowest. That means the first five ingredients typically make up about 80% of what you’re paying for.
Take that fancy hydrating serum you’ve been eyeing. If water, glycerin, and hyaluronic acid are the top ingredients, guess what? You’re halfway to recreating it already. The rest is just fine-tuning.
From Store-Bought to Self-Made: The Core Components
Every skincare product, no matter how exotic-sounding, typically contains these basic elements:
Base: Usually water or oil, this makes up the bulk of your product. Think of it as your canvas.
Actives: These are your star players – the ingredients that target specific skin concerns. Vitamin C for brightness, retinol for anti-aging, niacinamide for pore refinement.
Emulsifiers: The peacekeepers that help oil and water play nice together. Without these, your creams would separate faster than a Hollywood marriage.
Preservatives: The unsung heroes keeping your creations fresh and safe. Skip these, and you might as well put a “bacteria welcome” sign on your face.
Texture Enhancers: These give your product that luxurious feel that makes you go “ahhh” when it touches your skin.
Breaking Down Your Favorite Products
Let’s put this knowledge into practice. Say you’re obsessed with that $80 hyaluronic acid serum. Looking at the ingredient list, you might find:
Water (aqua) Glycerin Sodium Hyaluronate (that’s hyaluronic acid’s friendlier name) Panthenol Niacinamide Various preservatives and stabilizers
The secret? You can recreate this for about $15 worth of ingredients. The process isn’t just about saving money – it’s about understanding what really works for your skin and taking control of your skincare routine.
Finding Your Perfect Ingredient Matches
Listen, we’ve all been there – staring at an ingredient list full of scientific names that might as well be written in ancient Greek. But here’s something that changed my whole perspective: most fancy ingredients have humble cousins that work just as well.
Take that $90 hyaluronic acid serum you’ve been eyeing. The magic ingredient, sodium hyaluronate, sounds fancy, right? But guess what? A combination of glycerin and beta-glucan can give you that same plumping, hydrating effect. And the best part? It’ll cost you about a tenth of the price.
Here are some of my favorite swaps that I discovered after years of trial and error:
Instead of that pricey ceramide complex, try a blend of plant oils rich in linoleic acid. Sunflower and safflower oils are fantastic options that actually help repair your skin barrier. Your skin won’t know the difference, but your wallet sure will.
Dreaming of that luxury peptide cream? Rice protein extract contains similar amino acid sequences that help firm and tone your skin. Plus, it’s been used in Asian skincare for centuries. Sometimes the best solutions are the most time-tested ones.

The Heart of DIY Formulation: Your Step-by-Step Guide
Now, this is where things get exciting. Creating your own skincare isn’t just about mixing ingredients – it’s about understanding the dance between different components. Let me walk you through the process I’ve refined over countless batches.
Step 1: Define Your Skin’s Desires
Before you even think about measuring ingredients, ask yourself: what do I want this product to do? Are you after deep hydration? Brightening? Anti-aging benefits? Your goal will guide every choice you make.
I learned this the hard way after creating a super-rich cream when what my combination skin really needed was a light, hydrating gel. Take it from me – clarity saves both time and ingredients.
Step 2: Gathering Your Tools
You don’t need a lab full of equipment, but a few key tools will make your DIY journey so much smoother:
Digital scale (trust me, measuring by volume is like trying to bake a cake with your eyes closed) pH strips (because your skin has feelings about pH, and you should respect them) Heat-safe beakers or glass containers Mini whisk or milk frother Sanitizing solution (70% isopropyl alcohol works great)
I started with just a kitchen scale and some clean jars. As I got more serious, I slowly built up my collection. No need to buy everything at once – grow your toolkit as your skills develop.
Step 3: The Art of Formulation
Here’s where science meets creativity. Start with these basic ratios that I’ve found work consistently well:
Water phase: 60-80% of your formula Oil phase: 10-30% Emulsifier: 3-5% Active ingredients: 1-10% Preservative: 0.5-1.5%
Think of it like cooking – you start with a basic recipe, then adjust to taste. Only here, you’re adjusting for your skin’s preferences.
The first time I made a moisturizer, it turned out way too thick. But that’s the beauty of DIY – you can tweak the formula until it’s perfect for you. Start with small batches (30g is plenty for testing) and keep notes of every adjustment. Your future self will thank you.
Making it Safe: The Non-Negotiables of DIY Skincare
The first time I created my own face cream, I was so excited that I slathered it all over my face without a second thought. Big mistake. Huge. My skin turned angry red, and I learned a valuable lesson about patch testing that I’ll never forget. So grab a cup of tea, and let’s talk about keeping your creations both beautiful and safe.
Your New Best Friend: The Preservation System
Picture this: you’ve just whipped up the most gorgeous moisturizer. It feels like silk, smells divine, and your skin drinks it up like a smoothie. But without proper preservation, that jar of goodness could become a cozy home for uninvited guests – bacteria, mold, and yeast. Not exactly the spa experience we’re going for.
I used to think natural preservatives like grapefruit seed extract would do the trick. Spoiler alert: they don’t. After watching one too many beautiful creations turn funky, I discovered the magic of broad-spectrum preservatives like Germaben or Preservative Eco. These little warriors keep your creations fresh for months, not days.
The Sacred Art of Sterilization
My kitchen transforms into a mini lab when I’m creating. Every tool gets a thorough cleaning with 70% isopropyl alcohol. Those gorgeous glass jars? They take a steam bath before meeting any ingredients. It might seem excessive, but trust me – nothing ruins the joy of DIY skincare faster than contamination.
The Patch Test Promise
Make this your mantra: “I will always patch test.” Always. Even if you’ve used every ingredient before. Even if you’re just tweaking a tried-and-true formula. A small spot behind your ear for 24 hours can save you from a face full of regret.
When Things Don’t Go As Planned: Troubleshooting Your Creations
Let’s get real – not every batch will be perfect, and that’s okay. Some of my best formulations came from fixing mistakes. Here’s what to do when things go sideways:
The Great Separation Saga
If your cream splits faster than a banana split melts in July, don’t panic. Usually, it’s just asking for a bit more emulsifier love. Try increasing your emulsifier by 0.5% increments until everything plays nice together. I once had to remake a batch three times before finding that sweet spot – now it’s my holy grail moisturizer.
The Texture Tango
Too thick? Too thin? The consistency dance is all about balance. A cream that feels like butter probably needs more water phase. Something too runny might need more thickener or less water. Start with small adjustments – you can always add more, but you can’t take it out.
Remember that time I accidentally made a face cream so thick it could probably hold up a wall? A splash more aloe vera juice turned it into the most luxurious moisturizer I’ve ever used.
The pH Puzzle
Your skin likes its products slightly acidic, ideally between 4.5-5.5. If your creation isn’t in this happy zone, citric acid or lactic acid can gently lower the pH, while a tiny bit of baking soda can raise it. Just remember – tiny adjustments. We’re not making volcanoes for a science fair.
Taking Your DIY Game to the Next Level
You know that feeling when you’ve just created something amazing with your own hands? The way your heart swells with pride as you smooth that first batch of perfectly whipped moisturizer onto your skin? That’s what keeps me coming back to my DIY skincare station, tucked away in the corner of my kitchen, where magic happens in small batches and measured moments.
The Soul of Sustainable Beauty
The soft morning light streams through my window as I measure out ingredients for my weekly batch of face cream. The gentle scent of rose hydrosol fills the air, and I can’t help but smile, knowing that every ingredient in my formula was chosen with both my skin and our planet in mind.
Remember those endless rows of plastic bottles cluttering your bathroom shelf? My journey into DIY skincare started as a way to save money, but it blossomed into something more meaningful. Now I use glass containers that catch the light like precious gems, each one filled with potions I’ve crafted to match my skin’s ever-changing moods.
Some of my favorite eco-friendly swaps:
- Glass bottles rescued from my recycling bin, sterilized and given new life
- Organic ingredients sourced from local suppliers who share my values
- Biodegradable packaging materials for storing my raw ingredients
- Multi-purpose formulas that reduce the number of products I need
The Art of Seasonal Adjustments
Like leaves changing with the seasons, your skin’s needs shift throughout the year. The rich cream that nourished your winter-dry skin might feel too heavy come summer. That’s the beauty of making your own products – you can tweak them whenever your skin whispers for something different.
My summer formula is light as air, infused with cucumber hydrosol and aloe vera that cool and soothe sun-kissed skin. When autumn winds blow crisp and dry, I reach for more nourishing oils – a touch of argan here, a splash of squalane there. Each season brings its own rituals, its own unique blend of ingredients that tell the story of your skin’s journey.
Your DIY Skincare Journey: A Final Note
Looking back at my own path from curious beginner to confident formulator, I remember the mistakes that taught me the most valuable lessons. The time I forgot to pH test a vitamin C serum (hello, tingles!). The batch of lotion that turned into accidental whipped cream texture. Each “oops” moment became a stepping stone to better formulations.
Here’s what I wish someone had told me when I started:
- Start small, dream big. Your first attempts don’t need to be perfect.
- Keep a formulation journal. Future you will thank past you for those detailed notes.
- Trust your instincts. Sometimes the best creations come from playful experimentation.
- Build your ingredient library slowly. Quality over quantity, always.

Your DIY Checklist
Before you dive into your next creation, take a breath and check:
✓ Have you researched each ingredient’s purpose and safety?
✓ Is your workspace clean and organized?
✓ Do you have your preservation system ready?
✓ Have you written down your formula?
✓ Are your tools properly sanitized?
✓ Do you have pH testing strips handy?

Final Thoughts
As the sun sets on our DIY skincare journey together, remember that every expert formulator started exactly where you are now – with curiosity, determination, and maybe a slight fear of measuring preservatives. Your first creation might not be perfect, but it will be yours, made with intention and care.
The world of DIY skincare isn’t just about recreating expensive products. It’s about understanding your skin, respecting the ingredients that nurture it, and finding joy in the process of creation. Each time you blend, whisk, and pour, you’re not just making skincare – you’re crafting self-care moments that ripple through your daily routine.
So go ahead, measure out that first ingredient. Turn on your favorite music, light a candle if you’d like, and embrace the adventure ahead. Your skin’s perfect match is waiting to be created, one careful measurement at a time.
Remember, the most beautiful part of DIY skincare isn’t just the products you make – it’s the confidence you build, the knowledge you gain, and the ritual of self-care you create. Now, go forth and formulate something wonderful.